

Home Decorating, Create, Family, Gardening, Repurpose and DIY
Showing posts with label INSPIRATIONAL PROJECTS. Show all posts
Showing posts with label INSPIRATIONAL PROJECTS. Show all posts
February 23, 2017
Inspirational DIY ideas
I took some time off from blogging busy with real estate and new classes . I'm back. We are on school vacation this week. Here are some projects I finally completed and sold through the local auction house.


November 14, 2016
Update to Happy Halloween Driveway decoration display Winners
The Scarecrows on Parade Contest have announced the winners for 2016. Our Gru and Minions won the residential display prize; a good friend of ours Chimney Sweepman won the business display prize.


Here's the link if you want to check it out. http://www.northreadingma.gov/parks-recreation/news/scarecrows-parade-winners
We already have an idea for next years entry.
July 24, 2016
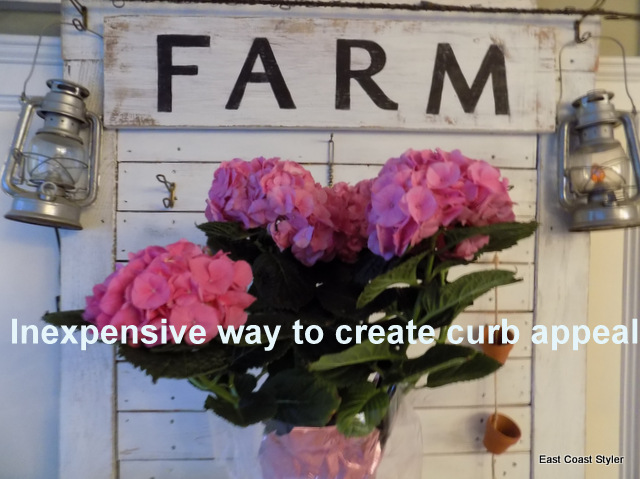
Create curb appeal for your home
Good Morning,
Does your home lack curb appeal? It's the first thing people see when they visit or are just driving by. Is the front of your home warm and inviting? There are hundreds of ways to spruce up your home's curb appeal. Many are inexpensive.

April 11, 2016

July 10, 2015
Mix n Chic Style Challenge-Decorate bringing the outdoors in
TGIF . Yesterday flew by. Have you ever been stuck on decorating ideas and not knowing where to start? I'd like to share some tips with you that I use . Pick one or two items and let your imagination go wild . There are no rules when it comes to decorating . I'll show you how I chose to bring the outdoors in for this design Mix n Chic Style Challenge . I headed over to Chairish, an online marketplace for vintage and used furniture. They have a great selection of Shabby Chic pieces to add to your home. When the paint is peeling and the metal is rusty, the easier it is to mix it in with any decorating style.

June 8, 2015
Hall Tree Bench Made from Pallet Wood
I finally finished making the entry way hall tree bench this past week. I have been wanting to make one for a very long time now. It's been so hectic around here with the construction going on for the new addition. We are trying to move furniture from 2 rooms as the new addition gets tied into our home with beams, a door and window. There is just no more room to put anything during this time. I did manage to complete some DIY projects that you can make too.


April 22, 2015
Wood Log Mounted Deer Antlers idea
While our tree guy Dan was trimming some trees for us to prep for the new addition construction site, I had him cut some slices off the logs for me approx. 3 inches thick so I could mount the deer antlers I bought last year.


Here's Dan our tree guy on a smaller tree we had to remove. I planted 8-9 trees last year around our property to make up for the two we had to remove.

I've been letting the log slices dry out for 3-4 months now. They will split during the drying process if left untreated. I used a stain mixed with polyurathane and applied several coats.

The log slice doesn't look like it's been treated because it just absorbs the stain/poly like a sponge as it dries out. There is a product you can buy for this process, but it's expensive and I'm only doing this one slice. The other 2 slices did split as they were drying out.
Traced the skull of the antlers onto the wood and remove the inside of the wood so the antlers sit flush.

Cut pieces of rope and cover the skull. You can use a glue gun to attach the pieces.

I originally hung this without mounting it to the wood but it didn't look finished.

I drilled the top of the skull at an angle and used a 3.5 inch wood screw to attach it to the wood.
I used two 2 inch screws for the bottom.

Drill a hole in the back of wood slice and hang on the wall. Since it's such a heavy piece, I decided to hang it on the pine wall in parlor (livingroom) instead of drywall in the den.

It's alot easier to do. A great place to hang my Stetson.

I've been letting the log slices dry out for 3-4 months now. They will split during the drying process if left untreated. I used a stain mixed with polyurathane and applied several coats.
Traced the skull of the antlers onto the wood and remove the inside of the wood so the antlers sit flush.
Cut pieces of rope and cover the skull. You can use a glue gun to attach the pieces.
I used two 2 inch screws for the bottom.
Drill a hole in the back of wood slice and hang on the wall. Since it's such a heavy piece, I decided to hang it on the pine wall in parlor (livingroom) instead of drywall in the den.
It's alot easier to do. A great place to hang my Stetson.
April 4, 2015
joss & Main Inspirational Painted Picture
I'd like to share with you a picture I saw on joss & Main that I gave me inspiration for a special Christmas gift. I was browsing on their website and came across this picture of a Shih Tzu dog. It looked almost exactly like my Mom's dog. Since it was only a few days until Christmas, I didn't have time to purchase it so I decided I'd try to paint one just like it.

December 20, 2014
Backyard Playhouse Shed made with Recycled Wood
I thought I'd give you a sneak peak at what I was working on this past summer for our 5 yr old son. I started to build an 8 x 10 shed playhouse for him from recycled wood. It is still under construction and I plan on finishing it up in the spring. He has alot of those pricey ride-on toys that we didn't want to leave out in the weather. I didn't want to take up space in our sheds for our mowers and yard tools with all his toys. I built this strictly for him and his toys.

March 19, 2014
Wood Baby / Dog Gate
Hello, I thought I would show you the wood baby / dog gate that I installed going from the den to the kitchen. The gate was in another place , but I decided to move it when I found our dog on our sofa in the wee hours of the night. He's not a small lap dog and rolls around in the yard. So our sofa is no place for him to be.

March 12, 2014
Old Picture Frame and Chicken Wire Art
Ever wonder what to do with old picture frames that have no glass? Try adding some chicken wire to the back of the frame to hang pictures or accent another piece of art. The projects are endless and you also get to recycle the old frame instead of tossing it.


February 4, 2014
Scrap wood Heart
The other day when I finished making chalkboard gifts for my son's teachers for Valentine's day , I had a small pile of scrap 1 by 2's leftover. The way they were piled on the floor kind of looked like a heart so I went with it. I only had to make a few cuts since most of the pieces were already at 45 degree angles.


December 13, 2013
Painted Wooden Sign and Post
I finished painting the post I made the other day. I made a sign for the Holidays . Paint the post white first and let it set for about 10 - 15 minutes.

December 3, 2013
Chalk Painted dresser with a stencil
Last year I got this dresser from a woman who was down sizing. It's old and definitely shows it's age. The top was peeling and part of the hardware is missing. I thought this would be a great piece to try chalk paint. I let it sit for awhile out in the garage. That's where my projects await me.

I was looking thru some blogs that I follow and got my inspiration from Red Hen Home (www.redhenhome.blogspot.com).

I was looking thru some blogs that I follow and got my inspiration from Red Hen Home (www.redhenhome.blogspot.com).

November 30, 2013
How to make a Pine Cone Wreath - DIY
I told you about a couple of wreaths that I made last week for Kim. Here is one of the wreaths and the way that I like to make pine cone wreaths.

November 25, 2013
Holiday Wreaths as a way to say ' thanks '
A month ago I met this wonderful woman named Kim. She collect these beautiful pinecones , thistle , and eucalyptus pods a few years back in California and Colorado and was saving them in her garage. She wanted to make ' something ' with them someday. Well she never got around to it and passed them onto me. There were bags and boxes of them. I was thrilled because the pinecones were so different from the pinecones here in Massachusetts. I made a promise to her that I would make her a gift with the pinecones, etc. I wondered for a couple of weeks what could I create for Kim that would be a wonderful gift as way to say ' thanks '. I had come up with so many ideas that I could do with the pinecones , but not knowing her style or what her house looked like on the inside it came down to making a wreath for her front door for her home.

I wanted to make something that she could have for the years to come. She can easily change the bow to give a it a fresh look year after year.
I'm on my way to deliver it to her, along with a second wreath of ribbon and door knob bells.


I will take pictures of it on Kim's door and show them when I get back home. I'm a little sluggish today because last night we went to NFL patriots game and boy, it was colder than cold. It was around 6 degress with the windchill. The wind was just going thru me. We definitely dressed properly but it didn't matter.


This is what we do for fun. We have one more game to go to for this season. I just hope it's not as cold as last night. There's something about the air at 1 am that just makes it feel colder when you're already freezing. My camera was freezing up so that's all I took for pictures. Needless to say, it was a great night despite freezing out feet off. I will show a tutorial of how I made the wreaths in another post when I get back home from Kim's.


I'm on my way to deliver it to her, along with a second wreath of ribbon and door knob bells.


November 24, 2013
Holiday Solar Lanterns - DIY
I have these lanterns outside for the summer with candles in them for tabletop lighting on the deck. I was going to put them away for the winter but decided to try to use them for the holidays instead.

As you can see the lanterns are old and rusty which I love, not to mention all dented. I went by the dollar tree store and picked up 2 holiday solar lights. I then masked and painted the lanterns with black spray paint.

I took the solar lights apart to use the tops of them only for this. I tried to goop the light inside the lantern , but it didn't hold. There is probably too much candle wax on the bottoms in the lantern. I had to think of something else to hold the lights in place. Yup, I borrowed some of my son's good ol' play-doh and I he had some black on hand. I made a couple of play-doh balls and stuck the light into it inside the lantern. I molded the edges over the sides. I tested the lights to see if they would light up outside at night and they did.


Once the play-doh dried and hardened , I added some pinecones cut in half around the base of the lights. I also added some holiday greenery at the tops of the lantern. When the spring comes , I will easily be able to take the holiday lights out and re-use the lanterns again for the spring. I think I can get another year out of them.


I just need to hang them outside.

As you can see the lanterns are old and rusty which I love, not to mention all dented. I went by the dollar tree store and picked up 2 holiday solar lights. I then masked and painted the lanterns with black spray paint.


November 14, 2013
Recycled Cabinet Door
I take trips to the local Restore often to see what has changed since my last visit. I often find myself leaving there with ' stuff ' and later asking myself " what am I going to do with this? " I got a plain old cabinet door for $5. I didn't need it for anything and didn't even know why I bought it. Maybe because I thought it was a good deal. It was hanging around in my garage (place where I create) and 4yr old son said to me " Mom, look what I did with the pencil ! " He wrote all over my new $ 5 cabinet door which would now need to be painted since he was bearing down on the pencil.

Here's the cabinet door. I didn't have much scrap wood in my pile and now I was in the mood to do something with the cabinet door. I looked around the yard and there it was...a section of fence. I wish now that I didn't use that section of fence because we need it for the yard but it's too late.
Oopps...


Here's the cabinet door. I didn't have much scrap wood in my pile and now I was in the mood to do something with the cabinet door. I looked around the yard and there it was...a section of fence. I wish now that I didn't use that section of fence because we need it for the yard but it's too late.

Subscribe to:
Posts
(
Atom
)
pin it

