

Home Decorating, Create, Family, Gardening, Repurpose and DIY
Showing posts with label Shabby Chic. Show all posts
Showing posts with label Shabby Chic. Show all posts
February 23, 2017
Inspirational DIY ideas
I took some time off from blogging busy with real estate and new classes . I'm back. We are on school vacation this week. Here are some projects I finally completed and sold through the local auction house.


July 24, 2016
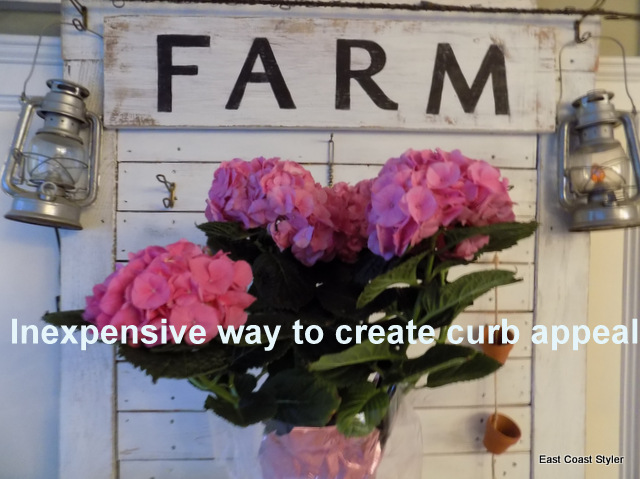
Create curb appeal for your home
Good Morning,
Does your home lack curb appeal? It's the first thing people see when they visit or are just driving by. Is the front of your home warm and inviting? There are hundreds of ways to spruce up your home's curb appeal. Many are inexpensive.

May 8, 2016
Country Style Gardening
Good Morning,
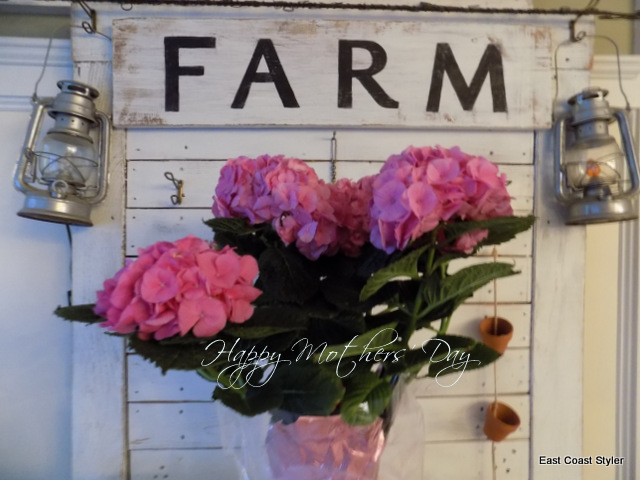
Happy Mothers' Day today. I will be out in the garden planting this pretty pink Mophead Hydrangea from my boys with a country style twist before the rain rolls in.
I think it will be a nice touch to add this bright pink hydrangea to the front of the house where the property opens up as you come down the long driveway. Just on the other side I planted a crab apple, which will make a nice combo for the garden.
Since I don't have Osmocote, a slow releasing fertilizer, I will be using a 10-10-10 fertilizer with this hydrangea.
Check back in later to see what I've done with this hydrangea and for some curb appeal ideas for you home.
Happy Mothers' Day today. I will be out in the garden planting this pretty pink Mophead Hydrangea from my boys with a country style twist before the rain rolls in.
I think it will be a nice touch to add this bright pink hydrangea to the front of the house where the property opens up as you come down the long driveway. Just on the other side I planted a crab apple, which will make a nice combo for the garden.
Since I don't have Osmocote, a slow releasing fertilizer, I will be using a 10-10-10 fertilizer with this hydrangea.
Check back in later to see what I've done with this hydrangea and for some curb appeal ideas for you home.

Enjoy your Mothers' Day!
November 29, 2015
New Construction Update no. 6 Kitchen granite and sink installed
Hope everyone had a wonderful and fulfilling Thanksgiving. The kitchen granite and sink is now installed.


I remember how upset I was when they didn't have the original piece of granite I picked out at the beginning of construction. I was forced to choose from 3 - 4 slabs of colors that were different from our original pick.
It actually turned out pretty nice.

The new color is slightly darker which makes a nice contrast with the white walls and cabinets. It also matches nicely with the stained woodwork.

The faucet I chose was different than the normal single hole faucet that usually gets installed with granite. I like having the two levers for the hot and cold. At least this way I have the option of installing a single lever faucet later if I changed my mind. The holes now are there now for either design faucet that I choose.
The sun and window glass is causing the colors in the picture.

So here is new kitchen completed. The cabinets were designed up to ceiling to keep from having to dust the tops because I'm lazy smart and looking to SIMPLIFY my life. We picked black appliances instead of stainless because I think black is going to be the way to go. The black appliances always look nice. I have black appliances in the my other kitchen.

This is open concept into the living room ( I call it a parlor ) . The floors are still covered and protected as there are still more contractors coming and going doing some finish work.

This is part of the living room from standing in middle of kitchen. It is much larger than the picture shows.

This is still my favorite room of the whole new construction project. I love the ship lap original wall and old window.
I will show you the window and how I distressed it out with just a little sanding and scraping of the multi layers of paint.
October 27, 2015
New Construction Update no. 5 Kitchen Granite and Hardwood Floors
The new construction project is near the end. I'm going to jump ahead here on the project since I lost a camera on vacation with pictures from the project on it.
The kitchen cabinets are now installed.

I picked out Martha Stewart Cabinet knobs and drawer pulls. All the appliances are going to be black. They're actually on the porch and going to be installed next.


At the beginning of the project, we picked out the granite for the kitchen. I had 7 samples to pick from.
When we were with the architect and going over the design, we already knew in the beginning what we wanted for colors and cabinets and stuck to the plan which made it easier. Once you change one thing, everything else changes and it could become overwhelming. If you are planning doing construction, know what you want before you start and try to stick to the plan. You don't want to stress out the contractor and make a million changes. It will slow down the job and the changes will effect other contractors on the job.

The granite we chose was now not available since we first picked it out months ago at the beginning of construction. This is the picture the granite store sent me with a piece similar to the piece we wanted.
I was not happy. I was also not going to select a piece of granite for the new kitchen through a picture in an email.
Our contractor called the granite store and set it up for me to go up and select a piece I wanted. I could drive 45 minutes west to go see the piece that was similar to what we picked or drive 30 minutes east and pick from 3 other pieces.
I dropped our son at school and headed up to see three pieces of granite.


The kitchen cabinets are now installed.

I picked out Martha Stewart Cabinet knobs and drawer pulls. All the appliances are going to be black. They're actually on the porch and going to be installed next.

Here are the choices we had for cabinet door styles. We chose the bead board doors with blank drawers since we already knew we were going to use the the " half moon " drawer pulls. My mom wanted all real wood cabinets which made a difference in some of the pricing. The corner lazy susan unit added in was $1800.

The plumber came and installed all the baseboard heat and tied everything in from the last time he came when he laid out all the plumbing.
Since we were adding a new zone to our heat , we decided to buy a new boiler/ heating system. We didn't replace what we had for a boiler, we bought a new system that mounts to the wall and it's high efficiency and qualifies for the tax credits.
We now have a 4 zone system.
The hardwood floors are installed here in Dark Walnut with 2 coats of poly. The floors will get one more finish coat of poly once the appliances are in and the plumber leaves.
We placed cardboard on all the floors to " plumber " proof them while he installed the heating.

When we were with the architect and going over the design, we already knew in the beginning what we wanted for colors and cabinets and stuck to the plan which made it easier. Once you change one thing, everything else changes and it could become overwhelming. If you are planning doing construction, know what you want before you start and try to stick to the plan. You don't want to stress out the contractor and make a million changes. It will slow down the job and the changes will effect other contractors on the job.

The granite we chose was now not available since we first picked it out months ago at the beginning of construction. This is the picture the granite store sent me with a piece similar to the piece we wanted.
I was not happy. I was also not going to select a piece of granite for the new kitchen through a picture in an email.
Our contractor called the granite store and set it up for me to go up and select a piece I wanted. I could drive 45 minutes west to go see the piece that was similar to what we picked or drive 30 minutes east and pick from 3 other pieces.
I dropped our son at school and headed up to see three pieces of granite.

I got to pick from 3 pieces to stay within the budget of the project.

It was easy to choose the piece since I had to picture the white cabinets and dark walnut floors and black appliances against the slabs.

This piece was the prettiest. It had black , browns , hints of white , beige , gray and specks of maroon. I've seen a lot of granite when I was shopping for ideas and knew I didn't want the granite with the hints of purple in it. The granite with the specks of purple seemed like it was most popular and too common. I've also seen it in a lot of new construction while doing real estate. The trend is now light counters with white cabinets in this area of new $800,000 homes.

I insisted on keeping this wall with the ship lap boards. One of our contractors who is very meticulous was not happy with my choice. He wanted to go over it with new ship lap boards and I kept saying no. I wanted to keep the old window also. I was heartbroken when they cut into the wall. They had to set a beam for the roof and it destroyed the wall. I watched this wall throughout the whole project and a new guy they hired pieced the boards that were cut out and nailed them back in. I flipped out when I came home and saw this mess. The new guy could of put the boards back in the same spot like a puzzle that they were cut from. He didn't.
We headed to the lumber store and I bought some ship lap boards and ripped that whole side of the wall out that weekend. I talked to myself and cursed him for every board I ripped out.

The new ship lap boards are not exactly the same as the old original ship lap. Keep that in mind if you are repairing or replacing ship lap.
This is how it came out. I also sanded and distressed the frame of the old window. I now have a nice base for shabby chic farmhouse decorating for this room.
The reason we kept this window is for natural light into my dining room on the other side. I wanted to keep the house original even though we were tying in a 1,000 sq, ft. of new construction.
When the plumber finishes up, I will show you how nice the hard wood floors came out.
July 10, 2015
Mix n Chic Style Challenge-Decorate bringing the outdoors in
TGIF . Yesterday flew by. Have you ever been stuck on decorating ideas and not knowing where to start? I'd like to share some tips with you that I use . Pick one or two items and let your imagination go wild . There are no rules when it comes to decorating . I'll show you how I chose to bring the outdoors in for this design Mix n Chic Style Challenge . I headed over to Chairish, an online marketplace for vintage and used furniture. They have a great selection of Shabby Chic pieces to add to your home. When the paint is peeling and the metal is rusty, the easier it is to mix it in with any decorating style.

March 12, 2014
Old Picture Frame and Chicken Wire Art
Ever wonder what to do with old picture frames that have no glass? Try adding some chicken wire to the back of the frame to hang pictures or accent another piece of art. The projects are endless and you also get to recycle the old frame instead of tossing it.


March 4, 2014
Vintage Bed Spring Toilet Tissue Holder
Awhile back I received a significant amount of old mattress bed springs. I have three different sizes and styles. I have come up with a few ideas on what to do with them, but I mainly have them to sell on my Etsy shop. I think they will sell better if I take different pictures on how to incorporate them into decorating.
Here's is one idea I thought was different.

Here's is one idea I thought was different.
December 3, 2013
Chalk Painted dresser with a stencil
Last year I got this dresser from a woman who was down sizing. It's old and definitely shows it's age. The top was peeling and part of the hardware is missing. I thought this would be a great piece to try chalk paint. I let it sit for awhile out in the garage. That's where my projects await me.

I was looking thru some blogs that I follow and got my inspiration from Red Hen Home (www.redhenhome.blogspot.com).

I was looking thru some blogs that I follow and got my inspiration from Red Hen Home (www.redhenhome.blogspot.com).

November 23, 2013
Another ' CHUNKY ' Wood Frame - DIY
It's been a very busy week trying to get the outside of house freshened up to get ready for Holiday decorating. I have about 5 projects I'm working on that I should have finished in a day or two. Here is our thermometer that we rely on more than once a day in our house. I had some scrap wood lying around so I thought it would beef it up a little.


November 20, 2013
DIY SCRAP WOOD ' CHUNKY ' FRAMES
While I was staining and painting the house , it was hard not to notice some of my outside decorations weren't looking so good. I thought I would clean them up a bit and add to the frames.


Subscribe to:
Posts
(
Atom
)
pin it

